How to use the “Hero’s Journey”

Welcome to the first official article in my new series, Plotting Your Story. I’m going into all of the steps I use before I start writing and what I am actually using to finish my stories.
I won’t go into every step of the Hero’s Journey here. There are a ton of resources already out there about each individual step. Instead, I will talk about how I use it in my everyday writing.
What is the Hero’s Journey?
As a writer, the Hero’s Journey is one of the first things people like to bring up. With good reason, too. The Hero’s Journey is essentially the road map for every great story ever told. From Greek legends to Harry Potter, people have been using it for centuries.
The arc was first documented by Joseph Campbell, an academic and storyteller if there ever was one. He pieced together that many of the stories people had passed along through time had a similar structure that he was able to compile. Something he called the monomyth. George Lucas grew close to Campbell as he worked on the original Star Wars and structured the movie around Campbell’s work.
If it was good enough for George Lucas, than it is good enough for everyone else.
The problem is, despite the popularity of the Hero’s Journey, many people are still not using it. Writers starting out are using it as a loose guideline that they can deviate from willingly. I don’t want to paint myself as someone who follows hard rules, I think many writers can break off from the path, but you need to learn the rules so you know what to break.
You can’t miss the “Call to Action” for your protagonist, but maybe their “Meeting with the Goddess” can have a less literal interpretation or they refuse the Goddess entirely. Taking time to understand the Hero’s Journey can help inform structure in a way that may not be clear yet, but ignoring it entirely can make for a catastrophe. So, let’s start off with a diagram.
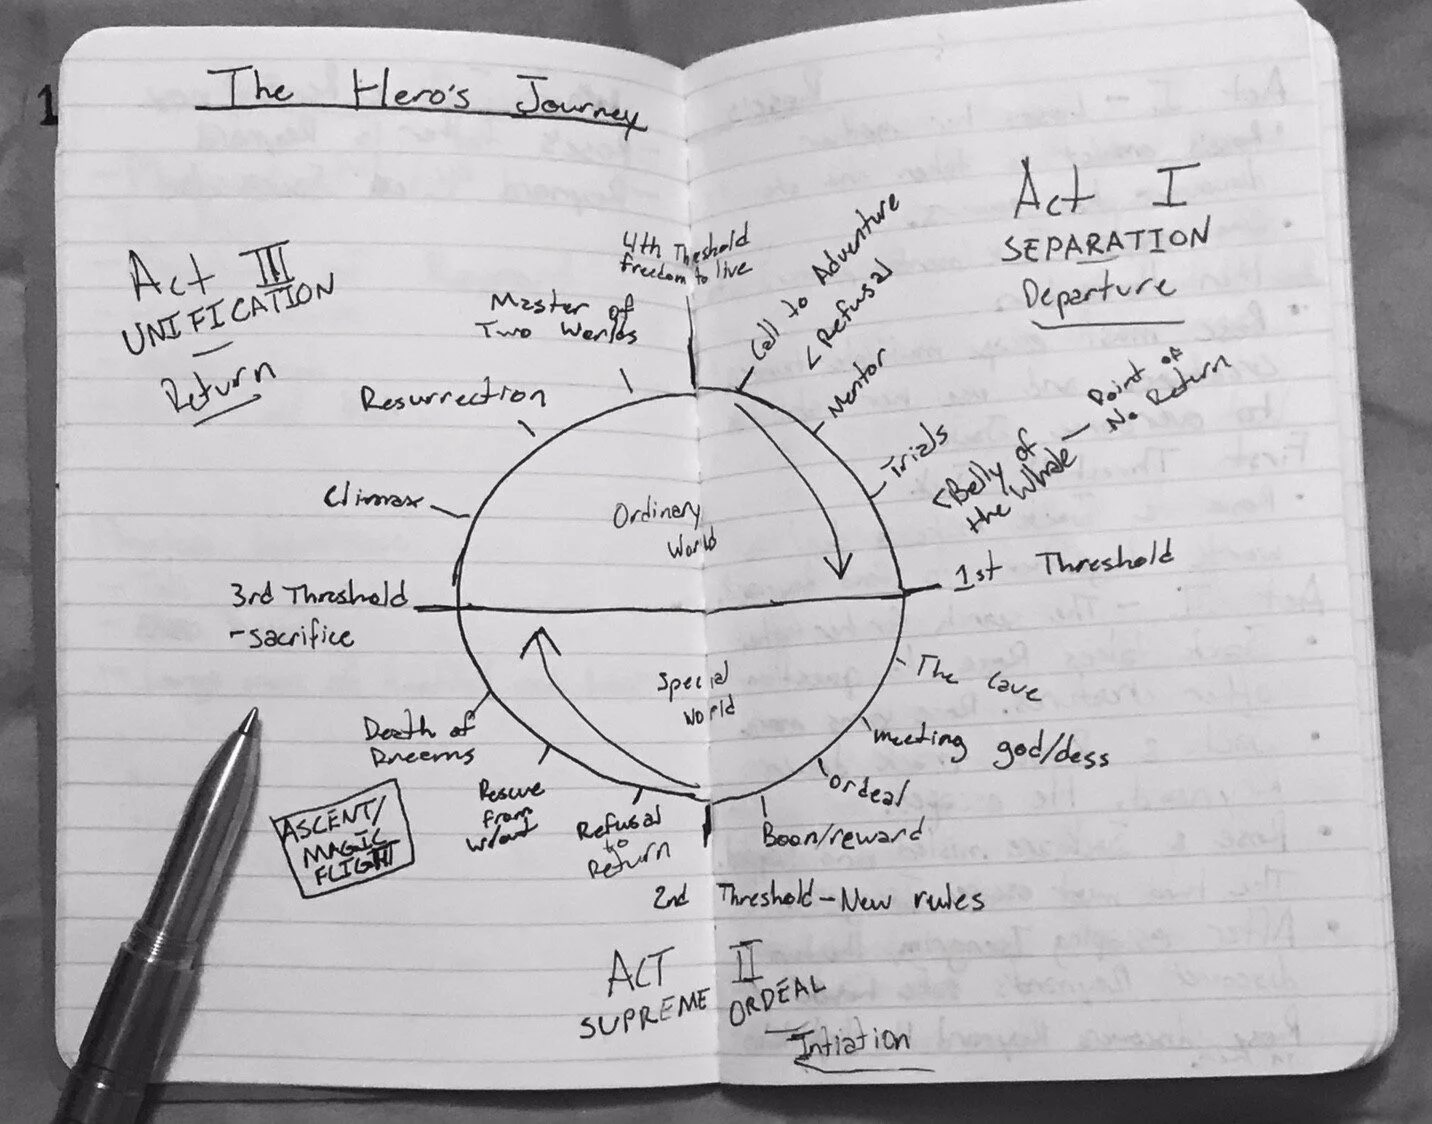
Excuse my poor artistic ability
This is the basic structure of the Hero’s Journey. If you have trouble reading my handwriting, there are a ton of digital copies online. I took the time to write mine down because it gave me a point of reference to use that wasn’t on a screen. It allowed me to focus on the steps as I thought of them and keep going. Now that you have that, let’s look at the steps of crafting your hero’s journey.
Crafting your hero’s journey
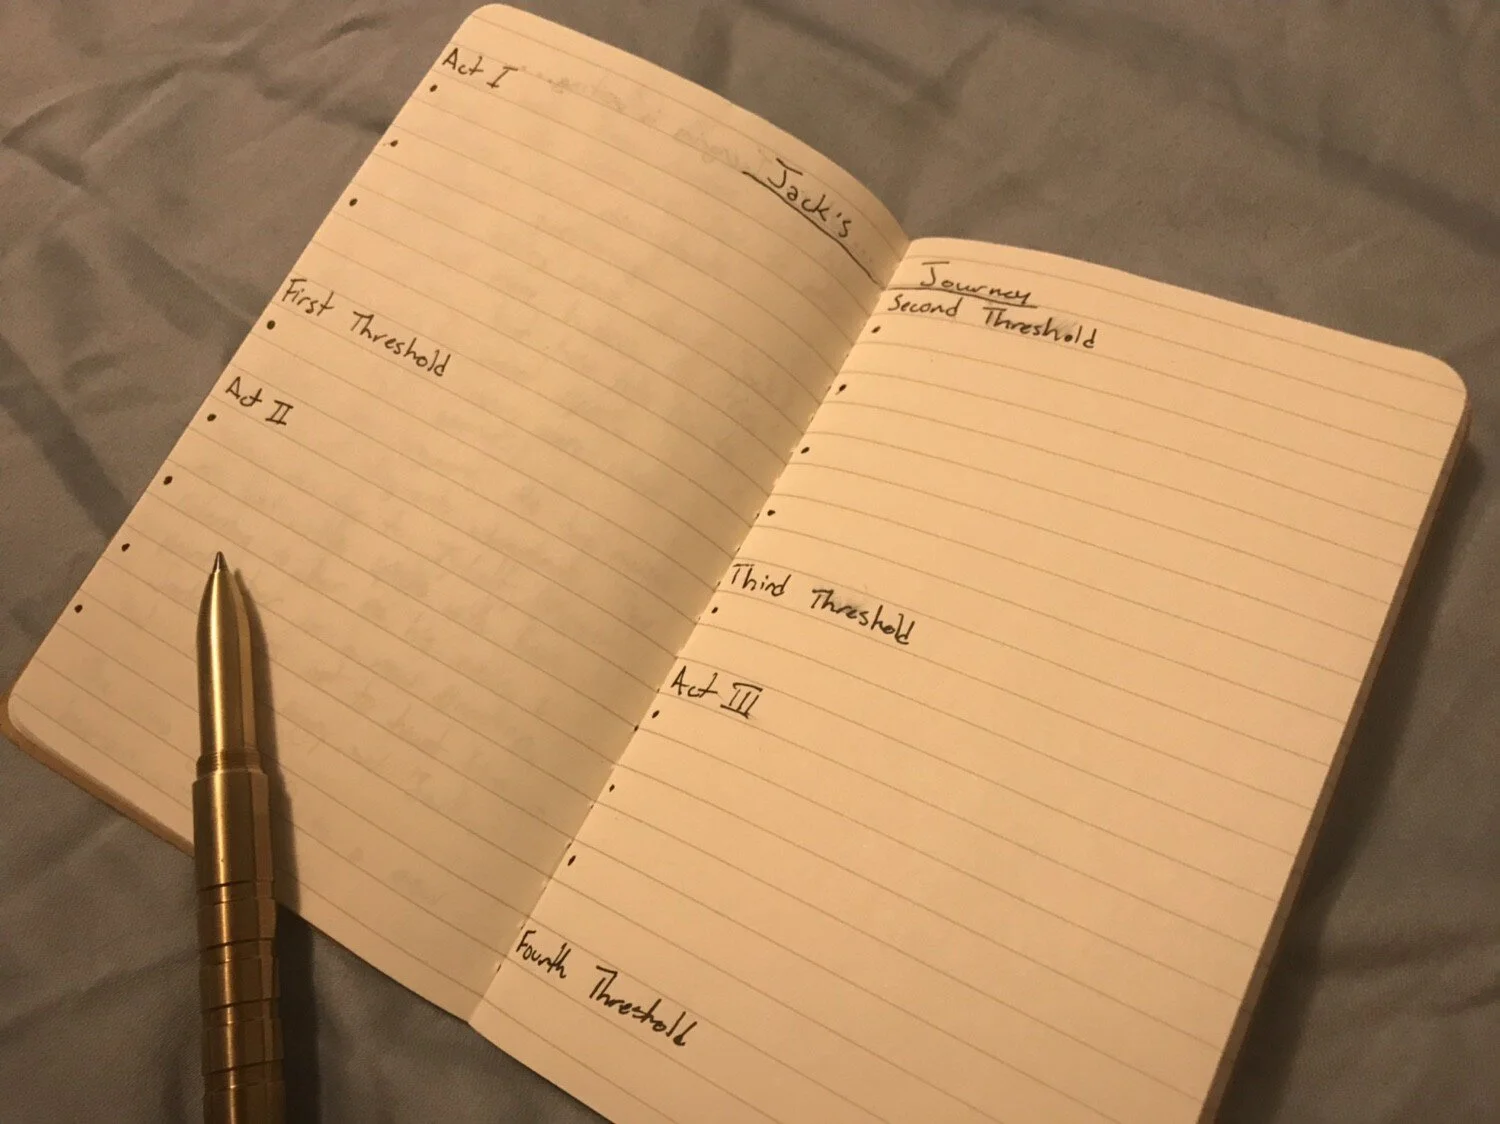
On the next page after drawing my diagram, I wrote my character’s name at the top of the page and made a bulleted list to show each step in the process of their journey. It will look something like this:
Hero’s Name
Act I—
•
•
•
First Threshold —
•
Act II —
•
•
•
•
Second Threshold —
•
•
•
•
Third Threshold —
•
Act III —
•
•
•
Fourth Threshold —
•
The End
This overall layout may differ from some you’ve seen before. I combined how I structure plots, in the form of a beat sheet, with the Hero’s Journey. Now, let’s break it down.
At each Act, write the major event that happens. This could be something your hero does or something that is done to them. Each bullet, (•), will have an event that corresponds with the details of the Hero’s Journey and progress the story’s point that you wrote for the Act. Then, at each Threshold, you’ll note what boundary they overcome to reach the next Act. The Threshold can be a person, place, thing, or even personal dilemma. It all depends on the story you are trying to tell.
If you line up your sheet with the Hero’s Journey, your first Act should look something like this:
Act I — Separation/Departure
• Call to Adventure
• Meet the Mentor
• Trials
First Threshold — Gateway/Guardian
• What happens to cross the ‘Threshold’
This is what it looks like after I’ve written it out
While the structure itself is basic, it’s sound. I always start with my Acts. I figure out what needs to happen at each point for the story to progress. This is literally just the beginning, middle, and end. Afterwards, I’ll start on the Thresholds that my hero must cross to make it to the end. Finally, I work the smaller details into the bullet points. I always work from the macro to the micro, entwining small details as I get more complex with the story.
You only ever want about two lines for each point. Remember that this is a map. Write too much and you’ll feel locked in; write too little and you’ll get lost. This is just a series of points that allows you to write a story. I’ve made a blank bulleted list, as well as one that has each point listed for reference. You can access the folder below to download the document and use it for yourself. Personally, I find value in handwriting the sheet but do what ever works for you.
Ready to write
After you’ve finished crafting your hero’s journey, it’s time to start writing. Don’t worry if you feel like you have gaps in the story or you’re not sure how to get from one point to the next. Just keep an eye on the horizon and let your characters decide. If you know your characters, then they’ll lead you from point-to-point.
Well, that’s all I’ve got on the Hero’s Journey. If you’re still curious about it, there are a ton of resources online and you could always check out Joseph Campbell’s original work, The Hero with a Thousand Faces. The next part of my series will be about how I use television writing to create a larger arc for my stories. You can follow my account if you want a notification when that is up, and please comment below if you have any suggestions or questions about how I use the Hero’s Journey to plot out my work.